Perfectly Roasted Chicken with Herb Gravy

My freshman year of college I was determined to roast my own chicken. Biting off way more than I could chew, the chicken was a complete disaster. Undercooked and then over cooked doesn’t exactly make for a delicious roasted chicken. Many of us obsessive home cooks like myself know the toll that ruining a recipe can take, but since several years have passed I felt it was time to pop the chicken back in the oven and give this one more go.

IMG_4512

I do not like to mess around with chicken that is why I usually stick with the organic! Honestly, $7.90 for a nearly  4 lb. chicken is just not that bad, especially when you pay about that, if not more, for skinless breasts.

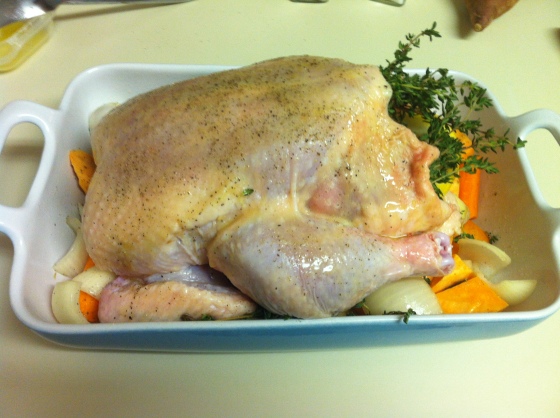
IMG_4515One of the main things I did not do the first time around was brine the chicken. I cannot tell you enough how much this changes the whole ball game of roasting a chicken (or turkey). I had always seen my dad brine his Thanksgiving turkey, and so I got some tips from him. Although it does mean you have to plan a bit ahead, it is probably the most simple step in creating your perfected roasted chicken.

Chicken Brine

Water to cover chicken

1/2 cup Salt

IMG_4519

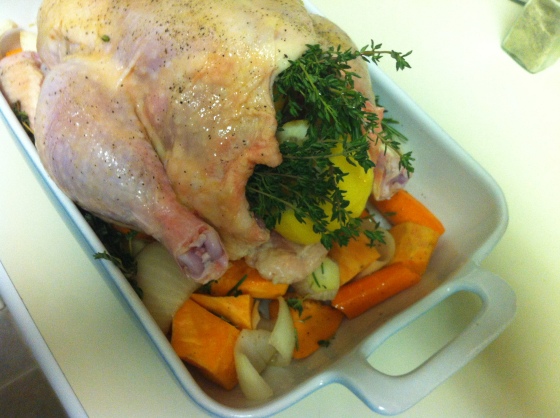
Something is just so beautiful about fresh herbs and freshly cut lemon…not to mention the amazing aroma.

IMG_4520

Carrots, sweet potatoes, and onions.

IMG_4521

IMG_4522

Adding the vegetables to the bottom of the pan really makes for a tender and delicious side!IMG_4526

My gorgeous final product! Again, hang in there with me on the pictures. I swear they will improve soon! I know it looks a bit toasty, but if I am going to have any of the skin…that is EXACTLY how I like it. I encourage everyone to make this chicken ASAP!! It was literally the best chicken I have ever had. As I always love to say after a good recipe…I hate to toot my own horn but…TOOT TOOT!

Perfectly Roasted Chicken with Herb Gravy

1 (4 to 5 pound) roasting chicken

Kosher salt

Freshly ground black pepper

2 large bunches fresh thyme

2 large bunches fresh rosemary

1 lemon, halved

1 head garlic, cut in half crosswise

2 tablespoons (1/4 stick) butter, melted

1 large onion, thickly sliced

4 carrots cut into chunks

3 sweet potatoes cut into chunks

Olive oil

2 tablespoons flour

1/4 cup chicken broth


Preheat the oven to 425 degrees F.

Rinse the chicken off and pat the outside dry. Generously salt and pepper the inside of the chicken. Stuff the cavity with one bunch of thyme, one bunch of rosemary, both halves of lemon, and all the garlic. Brush the outside of the chicken with the butter and sprinkle again with salt and pepper. Put the onions, carrots, and sweet potatoes in a roasting pan. Toss with salt, pepper, and olive oil. Spread around the bottom of the roasting pan and place the chicken on top. Place the remaining bunch of both the thyme and rosemary on either side of the chicken.

Roast the chicken for 1 1/2 hours, or until the juices run clear when you cut between a leg and thigh. Remove the chicken and vegetables to a platter and cover with aluminum foil for about 20 minutes. Discard the herbs, or what remains on the stems.

Take the pan drippings and add them to a medium sized skillet. Add the 2 tablespoons flour and whisk to combine. Let the mixture heat to thicken and then slowly add the chicken broth to desired consistency. 

Recipe adapted from Ina Garten.

Hope this chicken turns out as amazing for you as it did for me. Make it for dinner…tomorrow.

xo,

Emily

Kimberly and Spencer’s Entertainment Shower

After 20 years of friendship which includes pre-school, grade school, high school AND college together, my dear friend Kimberly is getting married and I am so honored to be by her side during this time. Her and her fiancé Spencer, had an Entertainment Shower that  was hosted by Donna and Richard Urrutia and my parents, Joe and Cathy Covington. The Urrutia’s were gracious enough to offer their home and fabulous back yard for the party…and when I say fabulous, that is an understatement for the space they have!

IMG_1987

Invitation | The Invitation Place |Birmingham, AL

The gift theme of the shower was Entertainment, but the actual theme was Bar-B-Q! Oh how BBQ is so quintessential of the south, and as a true southern girl I was just smitten with the theme! The food was catered by the beloved Jim ‘N Nick’s Bar-B-Q. I have been eating there since I was a child and they never cease to leave me pleased! While on the topic, Southern Living ran a contest where Jim ‘N Nicks won the Best Pork Sandwich by voters and I have to say I was one of those voters. Favorite pork sandwich and sauce for this girl.

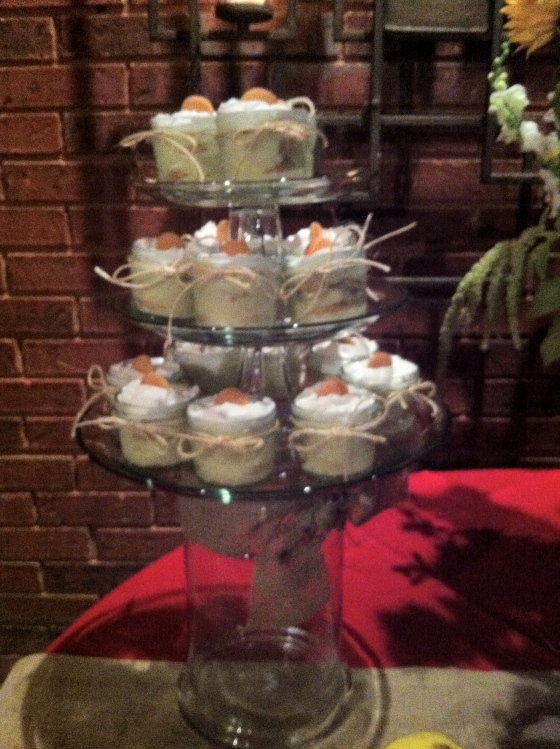
Because my parents were hosting, I decided to make some Miniature Banana Pudding’s to accompany the South’s finest BBQ we would be eating for dinner. What better way to make them than in mini mason jars?

IMG_4572

For the Recipe, I just used the one on the back of the box! I had flown in from Florida and did not have time to think of anything more out of the box (no pun intended) and my mom was great enough to have all the items ready to assemble when I got there the day before the shower!

IMG_4550One of my favorite things about making Banana Pudding is the absolute simplicity of the ingredients. Banana choosing tip: not too ripe! They ripen as they sit in the jars and I don’t like mine mushy anyways.

IMG_4554

Keeping with the ‘mini’ theme, the mini Nilla Waffers really work better than the large ones because you are able to put more down in the small jar you are working with.

IMG_4548To assemble a circle of this rubber mesh (used for can opening) helps keep the jars in place. The ribbon used was  twine!

IMG_4568I finished the pudding’s off with cool whip and an additional wafer for garnish and ta-da! Cutest looking dessert ever!

IMG_4575

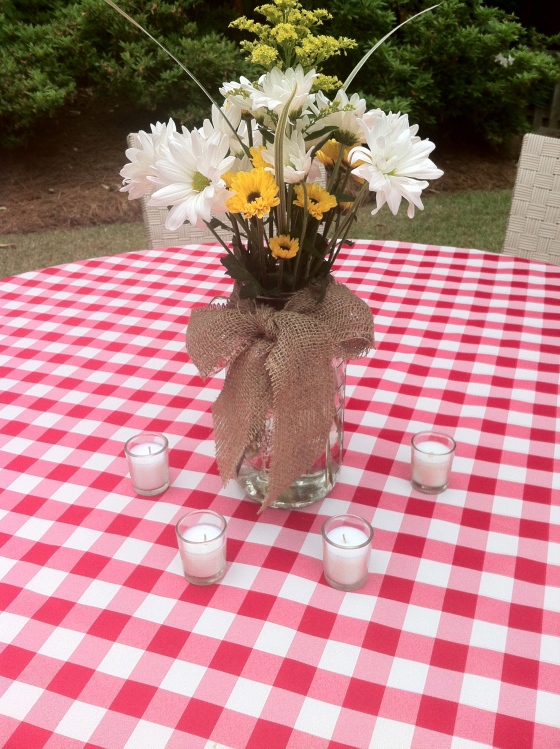
Donna, a hostess, arranged all of flowers by herself and they are unbelievably gorgeous. There is no better flower than the sunflower to go with a Bar-B-Q theme!

IMG_4577

IMG_4580

IMG_4584

IMG_4586Who would hate waking up to this everyday!? Told y’all it was fabulous.

IMG_4589

IMG_4594Yummy appetizer table! Here is where I have to make another Jim ‘N Nick’s plug: they arrived on time (before the guests were there), set up everything on their own so beautifully, and stayed the whole time keeping all the food organized, hot, and delicious. LOVE THEM! For some silly reason I did not take a picture of the full dinner table that had at the Bar-B-Q on it, but rest assured, it was delicious and gorgeous!

IMG_4596

I cannot get over how well these turned out.IMG_4598It was dark by the time I got to take pictures of the mini banana pudding’s soooo my pics are the best and here’s my secret …I have been using my iPhone for all of my blogging. My sweet mother is letting me borrow her awesome Nikon soon until I am able to get one of my own so I can improve this quality! SORRY! But anyways, Donna had the BEST idea of putting a cake dish down inside a vase to raise the pudding on different levels. SO smart, she is seriously the best at throwing a party.

IMG_4607Some of the bridesmaids with the bride! We love you!! Can’t wait for your big day in less than ONE WEEK now!

Hope everyone had a great holiday weekend!

xo,

Emily
Herb-Marinated Pork Tenderloin

Ina Garten is one of my Mom’s favorite chefs. She really pushed me to start looking in to the fabulousness that is Ina Garten (or the Barefoot Contessa). Its hard to find a bad Ina recipe. For the couple’s shower I threw, I wanted something my Dad could throw on the grill easily and would be economical and delicious for a big crowd.

This recipe for Pork Tenderloin was doubled for the party but here is the regular recipe, which still makes a lot (3 tenderloins!)

I hate that I did not get a photo of the finished product! Things got so crazy trying to feed everyone that it just slipped my mind!! But here is the pork marinating.

DSCN1471

Herb-Marinated Pork Tenderloin

1 lemon, zest grated

3/4 cup freshly squeezed lemon juice (4 to 6 lemons)

Good olive oil

2 tablespoons minced garlic (6 cloves)

1 1/2 tablespoons minced fresh rosemary leaves

1 tablespoon chopped fresh thyme leaves

2 teaspoons Dijon mustard

Kosher salt

3 pork tenderloins (about 1 pound each)

Freshly ground black pepper

Combine the lemon zest, lemon juice, 1/2 cup olive oil, garlic, rosemary, thyme, mustard, and 2 teaspoons salt in a sturdy 1-gallon resealable plastic bag. Add the pork tenderloins and turn to coat with the marinade. Squeeze out the air and seal the bag. Marinate the pork in the refrigerator for at least 3 hours but preferably overnight.

In Ina’s recipe, it says to roast the tenderloins, which I am sure would be absolutely delicious, but because the grill was already fired up for the chicken wings, at the shower my dad went ahead and grilled it and boy was it good!

Adapted from Ina Garten 

I highly recommend trying out this pork out, it was beyond delicious!!

Enjoy!!

xo,

Emily
Pots de Creme

Chocolate desserts are certainly a love of mine and this Pots de Creme is absolutely delectable. The Pioneer Woman is such an inspiration when it comes to cooking and especially blogging. I just love her site and all of her fabulous recipes. I found this particular recipe for Pots De Creme on the Pioneer Woman’s website and thought it would be the perfect chocolate dessert for the wedding shower I was hosting. The other dessert I was serving was Creamy Lemon Pie in Votive Cups, so there was a need for a chocolate compliment!

DSCN1522

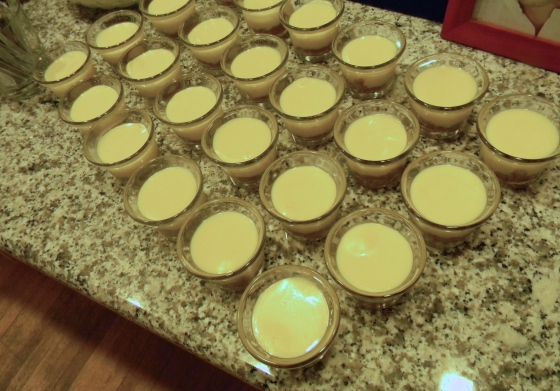
The Pots de Creme were made in little shooters and both desserts pictured were served along side a large bowl of fresh whipping cream!

DSCN1525

Pots de Creme

12 oz semi-sweetened chocolate chips

4 whole eggs

1 tablespoon Grand Marnier

1 dash salt

1 cup very hot strong coffee

Place the chocolate chips into a blender. Crack in the eggs, then add Grand Marnier and salt. Blend for a few seconds, or until combined.

Pour the coffee in a thin stream through the blender lid until it’s all added. Blend another few seconds, or until smooth.

Pour mixture into small cups or jars, then refrigerate for at least 2 hours, or until chilled and set.

Recipe | Pioneer Woman

Enjoy!

xo,

Emily
Creamy Lemon Pie in Votive Cups

One of my Dad’s all-time favorite things is lemon pie. I can’t think of many birthday’s of his growing up where this was not his dessert of choice. Last March was my Dad’s 60th birthday and my mom threw him a huge party. She insisted on making all the food herself, which I am glad because she made my Dad the cutest little lemon pie’s in votive cups.

Within the past few years my brother and I both became of the age where our friends started to get married and also just children of my parents close friends. With that being said, my parents have graciously hosted quite a few wedding showers. She has not only made these for my Dad’s 60th birthday party, but also several wedding showers previously so I knew I had to get her to make these for the shower I gave a few friends of mine. They were so adorable and everyone really loved them.

DSCN1524

Creamy Lemon Pie in Votive Cups

For Pie Crust:

1 1/4 cups Keebler® Graham Cracker Crumbs

3 tablespoons sugar

1/3 cup butter or margarine, melted

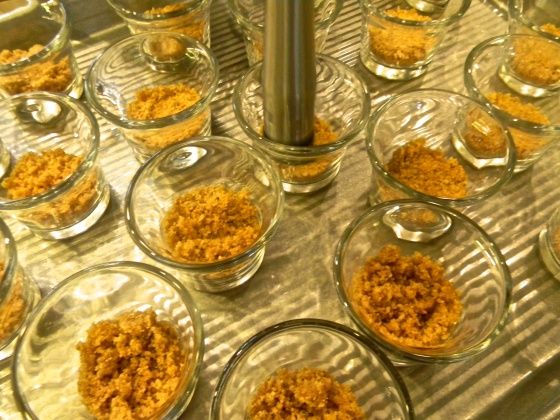
Preheat oven to 350°.  Combine crumbs and sugar in medium-sized bowl.  Stir in melted butter or margarine until thoroughly blended.  Pack mixture firmly into bottom of 24 votive cups.  (Use a muddler to pack the crumbs down.)  Place votive cups on a jelly roll pan and bake for 7 to 8 minutes.  Cool completely.

Here is a photo of my mom making the crust. She uses a muddler (that you use to crush ice for martinis and such) to press down the graham crackers to form the crust nicely in the votive cup.

DSCN1469

For Filling:

3 egg yolks

1 (14 ounce) can Eagle® Brand Sweetened Condensed Milk (not evaporated milk)

1/2 cup lemon juice

Whipped topping or whipped cream

Preheat oven to 350°.  In medium mixing bowl, beat egg yolks; stir in sweetened condensed milk and lemon juice.  Spoon filling into votives leaving enough headspace for topping.  Place votives on jelly roll pan and bake for 7 to 8 minutes.  Chill thoroughly.  Top with whipped topping or whipping cream.

Enjoy!

xo,

Emily

Rainbow Pasta Salad

I am a HUGE lover of pasta salad. One thing that can get very old with pasta salad is the usual boring (often overly salty) bottled Italian dressing dumped onto some cooked pasta and veggies. The thing thats so fabulous about this Rainbow Pasta Salad is that you DO NOT use bottled Italian dressing! It is versatile as well.

If there are certain things that are included in the recipe you don’t like then you can simply omit them. If there is a veggie or something else of yours that is not included in this version, just add it in!

DSCN1514

I made this as a side dish for a wedding shower I hosted for a girlfriend of mine, Tori. I think that pasta salad works so good as a side dish for a crowd and one of the main reasons is that you make it ahead of time. I made this on the Friday afternoon before the party on Saturday. Don’t shy away from recipes that say to chill/rest/marinate/etc for 24 hours! The next day you will thank yourself for having something out of the way! It also works good for a crowd because it is served cold or room temperature and this way when guests arrive you do not have to worry about what was goes in the oven and what needs to stay warm when it comes out.

DSCN1515

The color is just amazing on this delicious pasta salad. Keeps for days in the fridge!! Make this for your next party, lunch, or dinner! Great side for so many dishes. It is SO easy to make too! Just chopping a bunch of veggies and cooking pasta, piece of cake!

*Note: for the shower, I doubled this recipe, but the one listed below is just the regular one! So if you’re having a big crowd I would definitely double it!!

Rainbow Pasta Salad

12 ounces rainbow rotini,                         

cooked al dente, drained

Florets of 1 small bunch broccoli

3 green onions, chopped

1 rib celery, chopped

1 4-ounce can pitted black olives, drained

1/4 cup stuffed green olives

1 (14 ounce) can artichokes, drained

1/2 green bell pepper, coarsely chopped

1/2 red bell pepper, coarsely chopped

1/2 yellow bell pepper, coarsely chopped

3/4 tablespoon garlic salt

3/4 tablespoon parsley

3/4 tablespoon seasoned salt

Salt and pepper to taste

1/4 cup freshly grated Parmesan cheese

1/2 cup olive oil

3 tablespoons apple cider vinegar

Combine pasta, broccoli, green onions, celery, black olives, green olives, artichokes, and bell peppers in a large bowl and toss to mix.  Season with the garlic salt, parsley, seasoned salt, salt and pepper.  Sprinkle with the Parmesan cheese.  Add the olive oil and apple cider vinegar and toss to mix well.  Chill, covered, for 24 hours.

Recipe | Celebrate Highlands |Laurel Garden Club Cook Book

Enjoy!

xo,

Emily

Mediterranean Bean Salad

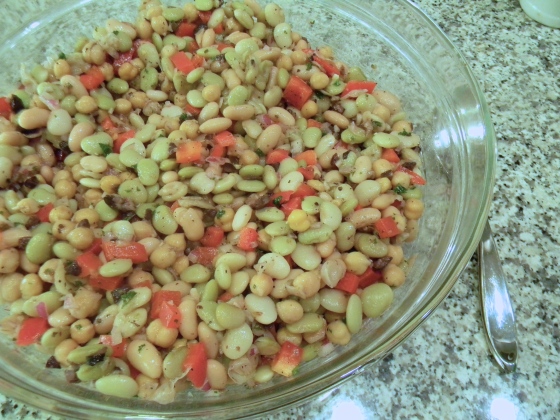
Here is the recipe for a Mediterranean Bean Salad that I served at a Couple’s Shower for a few friends of mine. If you would like to read more about the shower you can click here! I tripled the recipe because of the crowd  I was having so this one serves a pretty big group.

I love this salad because its so different. Normally when you are eating beans its baked beans or beans by themselves. The Greek vinaigrette that is put on top makes this the most perfect dish.

DSCN1519

Mediterranean Bean Salad

7 1/2 tablespoons olive oil

71/2 tablespoons red wine vinegar

3 teaspoons sugar

1 1/2 teaspoons salt (plus more to taste)

3/4 teaspoon ground black pepper

3/4 teaspoon dried oregano

3 tablespoons flat leaf parsley—finely chopped

2 cloves garlic—minced

6 cups frozen lima beans— cooked

3 cups canned cannellini beans—rinsed and drained

3 cups canned chickpeas—rinsed and drained

18 kalamata olives—chopped

1 1/2 red pepper—chopped

3/4 red onion—finely diced

Cook the lima beans in rapidly boiling water for as directed, then rinse under cold water. Put the olive oil, vinegar, sugar, salt, pepper, oregano, parsley and garlic in a screw-top jar and shake until well combined. Place the beans, olives, red pepper, and onion in a large bowl, then toss with the dressing until well combined. Let chill at least an hour before serving.

Recipe | MediterrAsian

Enjoy!

xo,

Emily

Sweet and Spicy Chicken Wings

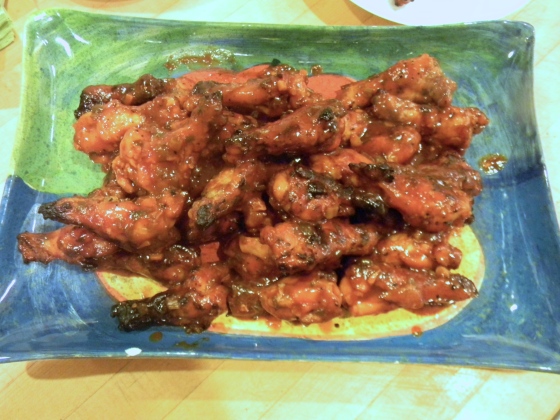
My parents started serving these at my brother’s high school graduation party and they have been a hit at many gatherings since! Most recently these were served these at the wedding shower I threw for two friends of mine. I would recommend you make these when it is warm out seeing that you do have to use the grill, but the night of the shower that we served these at, it snowed! My parents have a beautiful outdoor cooking area that has a fireplace attached so everyone enjoyed the warmth of the fire while seeing the rare and beautiful snow in Alabama.

The sauce has a kick but is still sweet from the honey at the same time. They are perfect for many kinds of parties or just a fun night with family. Most of the cooking is done indoors and they are just finished up on the grill so you don’t have to be a grill expert to try these awesome wings out!

DSCN1510

Sweet and Spicy Chicken Wings

1 cup purchased barbeque sauce

1/2 cup ketchup

3 green onions, finely chopped

1/4 cup honey

2 tablespoons fresh lemon juice

2 tablespoons Worchestershire sauce

1 large garlic clove, chopped

1/2 teaspoon ground black pepper

1/2 teaspoon hot pepper sauce

Olive oil

18 chicken drumettes

Mix first 9 ingredients in medium saucepan over medium-high heat.  Bring to boil, stirring often.  Reduce heat to medium low.  Simmer 15 minutes.  (Can be made 1 week ahead.  Transfer to bowl.  Cover; chill.  Rewarm before serving.)

Preheat oven to 350° F.  Brush rimmed baking sheet with oil.  Pat drumettes dry; brush with oil.  Sprinkle drumettes with salt and pepper; arrange on sheet.  Roast until cooked, turning over once, about 30 minutes.  (Can be made 1 day ahead.  Cool slightly, cover, and chill.)

Prepare barbeque (medium-high heat).  Brush drumettes with barbeque sauce.  Grill until heated and slightly charred, turning occasionally, about 12 minutes.  Serve with remaining sauce.

Recipe | 2002 Bon Appetit Magazine

Enjoy!

xo,

Emily

Baked Southwestern Egg-rolls

One of my boyfriend’s favorite things is the Southwestern Egg-rolls from Chili’s. In attempts to keep myself out of Chili’s as much as possible, I searched my dearly beloved Pinterest for a recipe to make this love affair of his on my own at home. I succeeded and tried these out for the first time on my parents and our closest friends at the lake this summer. Everyone, along with my boyfriend, loved them so much! I was so ecstatic that I had found a recipe to make something he really loved at home and so much healthier than the deep fried option at Chili’s.

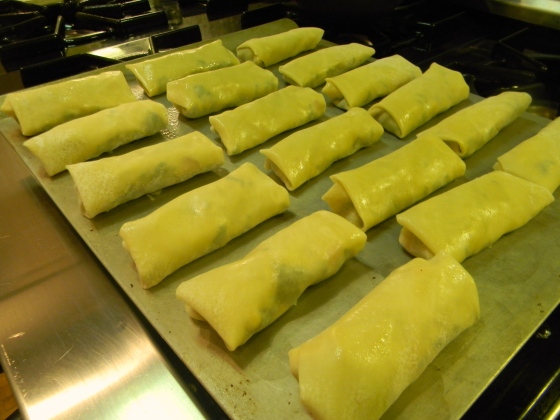
Here is a photo of my pretty egg-rolls all ready to go in the oven!

DSCN1504

For the couple’s shower I had at my parents house a few weeks ago I served them with some spicy ranch on the side and boy were they a hit! I always get nervous when I make things for a big crowd outside the comfort zone of my family and was so please with the great reception that they had.

DSCN1512

I couldn’t even get a photo before some were snatched up! I decided to cut them in half to make it easier for guests to eat them!

Baked Southwestern Egg-rolls

1 cup corn (frozen or canned) 

1 (15 oz.) can black beans, rinsed and drained

1 (10 oz.) package frozen chopped spinach, thawed and squeezed dry

2 cups shredded Mexican cheese blend

1 (8oz.) package cream cheese, softened

1 (4 oz.) can diced green chiles, drained

1 red pepper, diced

4 green onions, chopped

1 tsp. ground cumin

½ tsp. chili powder

1 tsp. salt

½ tsp. pepper

¼ tsp. cayenne pepper

1 package egg roll wrappers (about 24 total)

Preheat the oven to 425˚ F.

In a large bowl, combine everything but the egg roll wrappers and beans. Mix well to blend. Once everything is blended well softly fold in beans. Lay an egg roll wrapper out on a work surface so that one of the corners is pointing toward you and place ¼ cup of the filling in the center. Fold the tip closest to you up over the filling, roll a bit, then take the points pointing outward and fold them in toward the center. Continue rolling into an egg roll shape until a small part of the remaining point is still free. Dip a finger in water or beaten egg and lightly brush on the edges of the free corner. Finish rolling and press to seal closed. Repeat with the remaining wrappers and filling.

Lightly oil a baking sheet with cooking spray. Place the sealed egg rolls on the baking sheet seam side down and spray the tops of the egg rolls with cooking spray. Bake for about 15 minutes, or until lightly brown, turning halfway through baking. Serve warm with Spicy Ranch.

Recipe adaptation |  Annies-Eats.

Spicy Ranch

1 package Hidden Valley Ranch Dressing or Dip Seasoning

1 16oz container light sour cream

milk to thin out to preferred consistency

hot sauce to preferred heat (I put lots!)

Mix all ingredients and chill until ready to serve.

Enjoy!

xo,

Emily

Dad’s Famous Pimento Cheese

I love pimento cheese so much and it is because of my Dad. He has perfected making it and I try all the time to make mine as close to his as possible. Even people who shy away from pimento cheese have grown to love his. Not only is this a cheap way to make an appetizer for a party that everyone will love, it keeps for at least a week so you can use leftovers for sandwiches and snacks throughout the week!

DSCN1505I served this at the wedding shower I hosted with just various crackers along side. You can serve with your favorite veggie, pretzel, pita bread, and basically anything else that goes with dips or cheese!

Dad’s Famous Pimento Cheese

1 (16oz.) block of EXTRA SHARP cheddar cheese *

1 small jar diced pimentos, drained

1 fresh jalapeño diced, seeds and stems removed

1/4 cup mayo**

Frank’s hot sauce to taste

*must use extra sharp!!! it’s the secret!

**may need more mayo as you go along! Just add more if it seems dry. You want more than you think!

Mix all ingredients and chill for at least an hour before serving!

Enjoy!

xo,

Emily